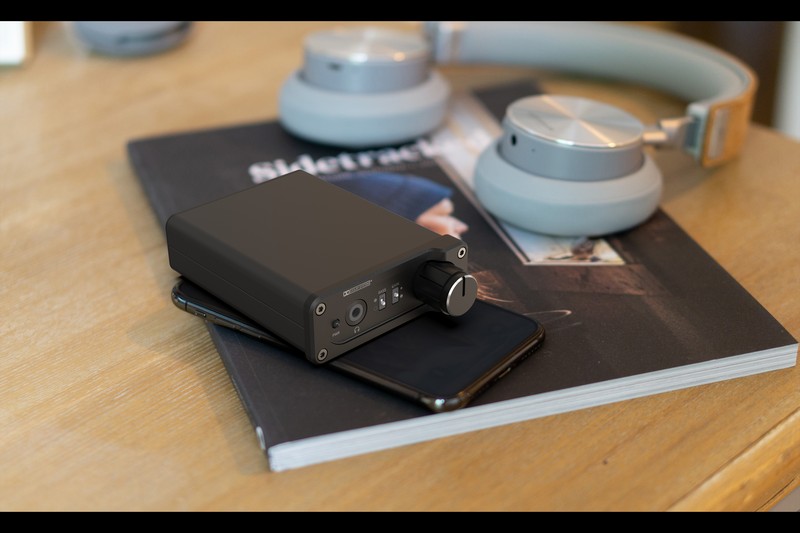
We have recently completed a sampling project for audio equipment. In the current sector of custom enclosure for DAC & headphone amplifier all-in-one unit, both audiophiles and regular users have set unprecedentedly stringent requirements on the texture of desktop DAC headphone amplifier aluminum enclosure. Besides solving core technical issues such as high-end op-amp heat dissipation and electromagnetic interference, the visual design and assembly tactility of desktop DAC headphone amplifier aluminum chassis often directly determine the market premium of the device. With this matte black prototype sample newly in hand (refer to the attached image), we are going to analyze its structural ingenuity and surface craftsmanship logic in detail for industry peers.
Immersive Texture: Panel Craftsmanship of Desktop DAC Headphone Amplifier Aluminum Enclosure
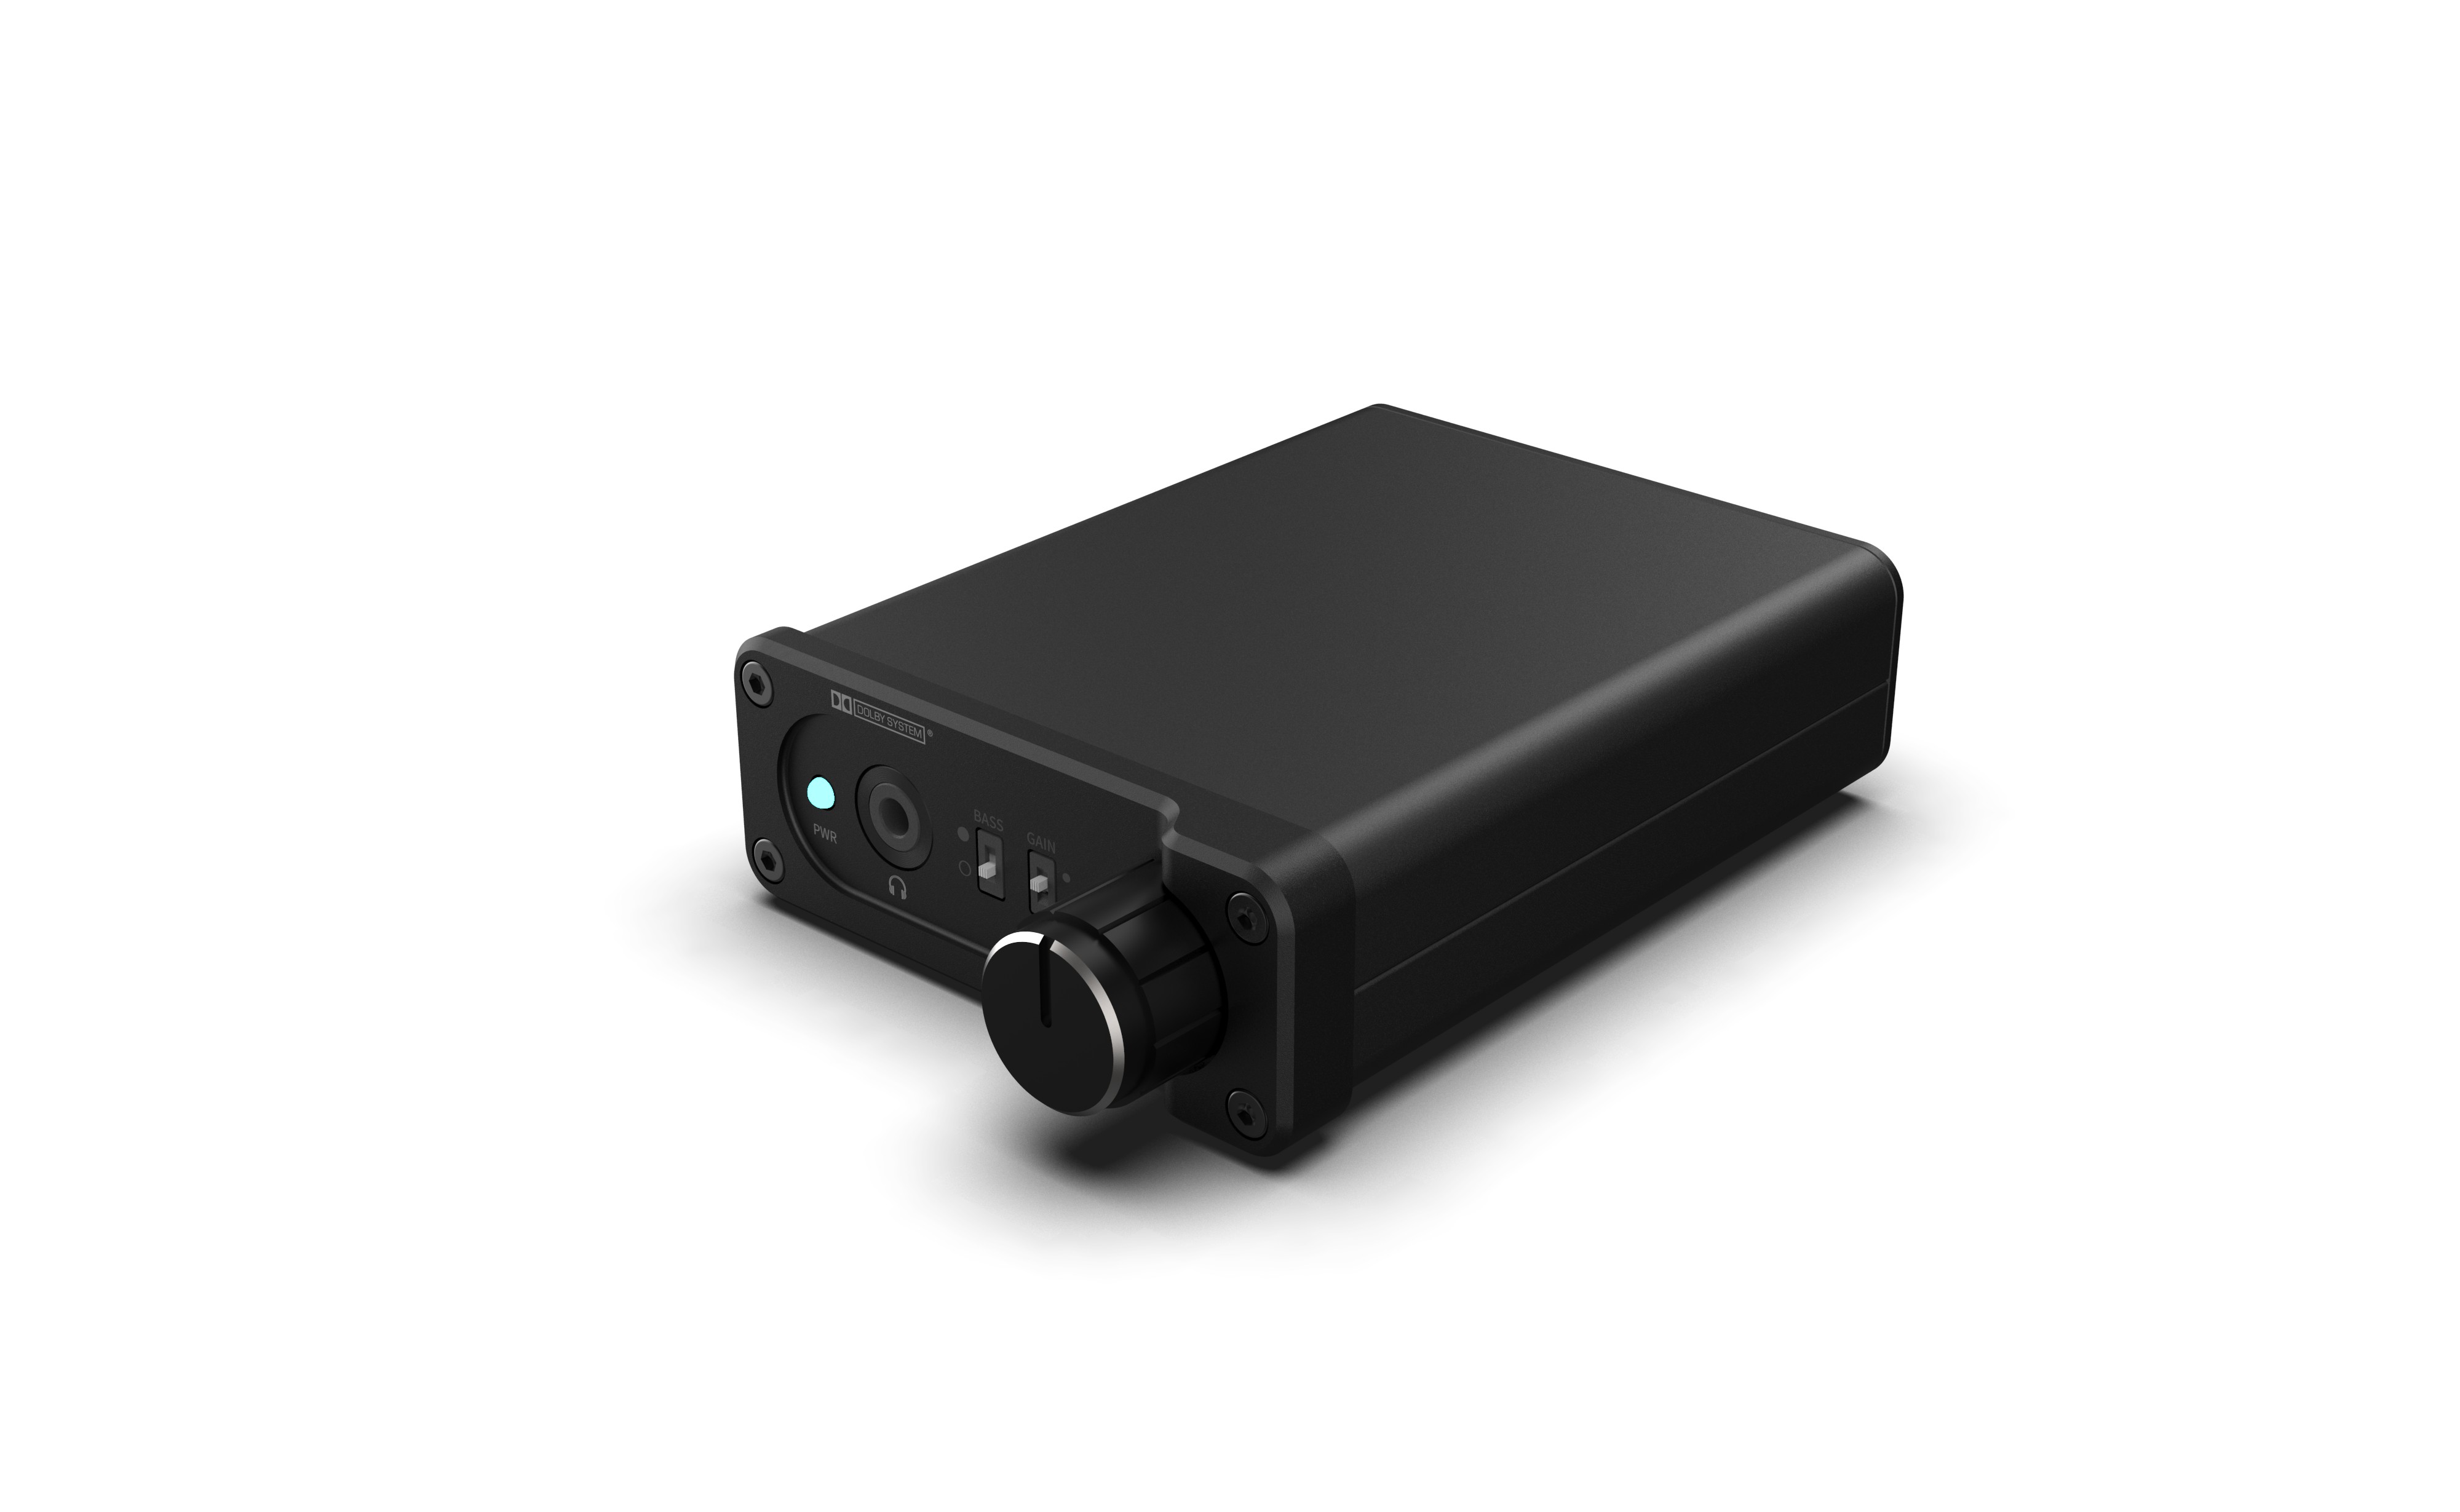
The first impression of this prototype is understated yet solid. In terms of front panel design, it abandons fancy styling and adopts a hardcore industrial style. Looking closely at the four corners, we reserved exposed blackened hex socket cap screws. These not only fasten the front panel firmly, but also represent a much-loved mechanical design language in Hi-Fi audio devices, giving users a psychological sense of sturdiness and robustness.
Moving to the core interactive area of the panel, the surface is treated with fine sandblasting over 120 mesh combined with deep space black anodization. This process not only eliminates the cheap reflective sense of raw metal, but also effectively avoids fingerprint marks left by daily switch operation. Notice the power button on the left side of the panel with an ultra-narrow light guide ring around it. When the faint blue PWR indicator lights up, the edge presents an extremely sharp outline. This requires the CNC machining tolerance of the stepped hole for the acrylic light guide column to be controlled within 0.05mm; otherwise, unpleasant light leakage and divergence will occur.
In addition, the cutout design for BASS and GAIN toggle switches is exquisitely crafted. To ensure proper damping and stability when toggling the lever, the rectangular openings on the aluminum panel must fit precisely with internal PCB switches. Matched with the solid aluminum volume knob with high-gloss chamfers beside it, the entire front UI delivers an extremely compact interactive feel.
Rear Interface Layout: Tolerance and Shielding Consideration of Desktop DAC Headphone Amplifier Aluminum Chassis
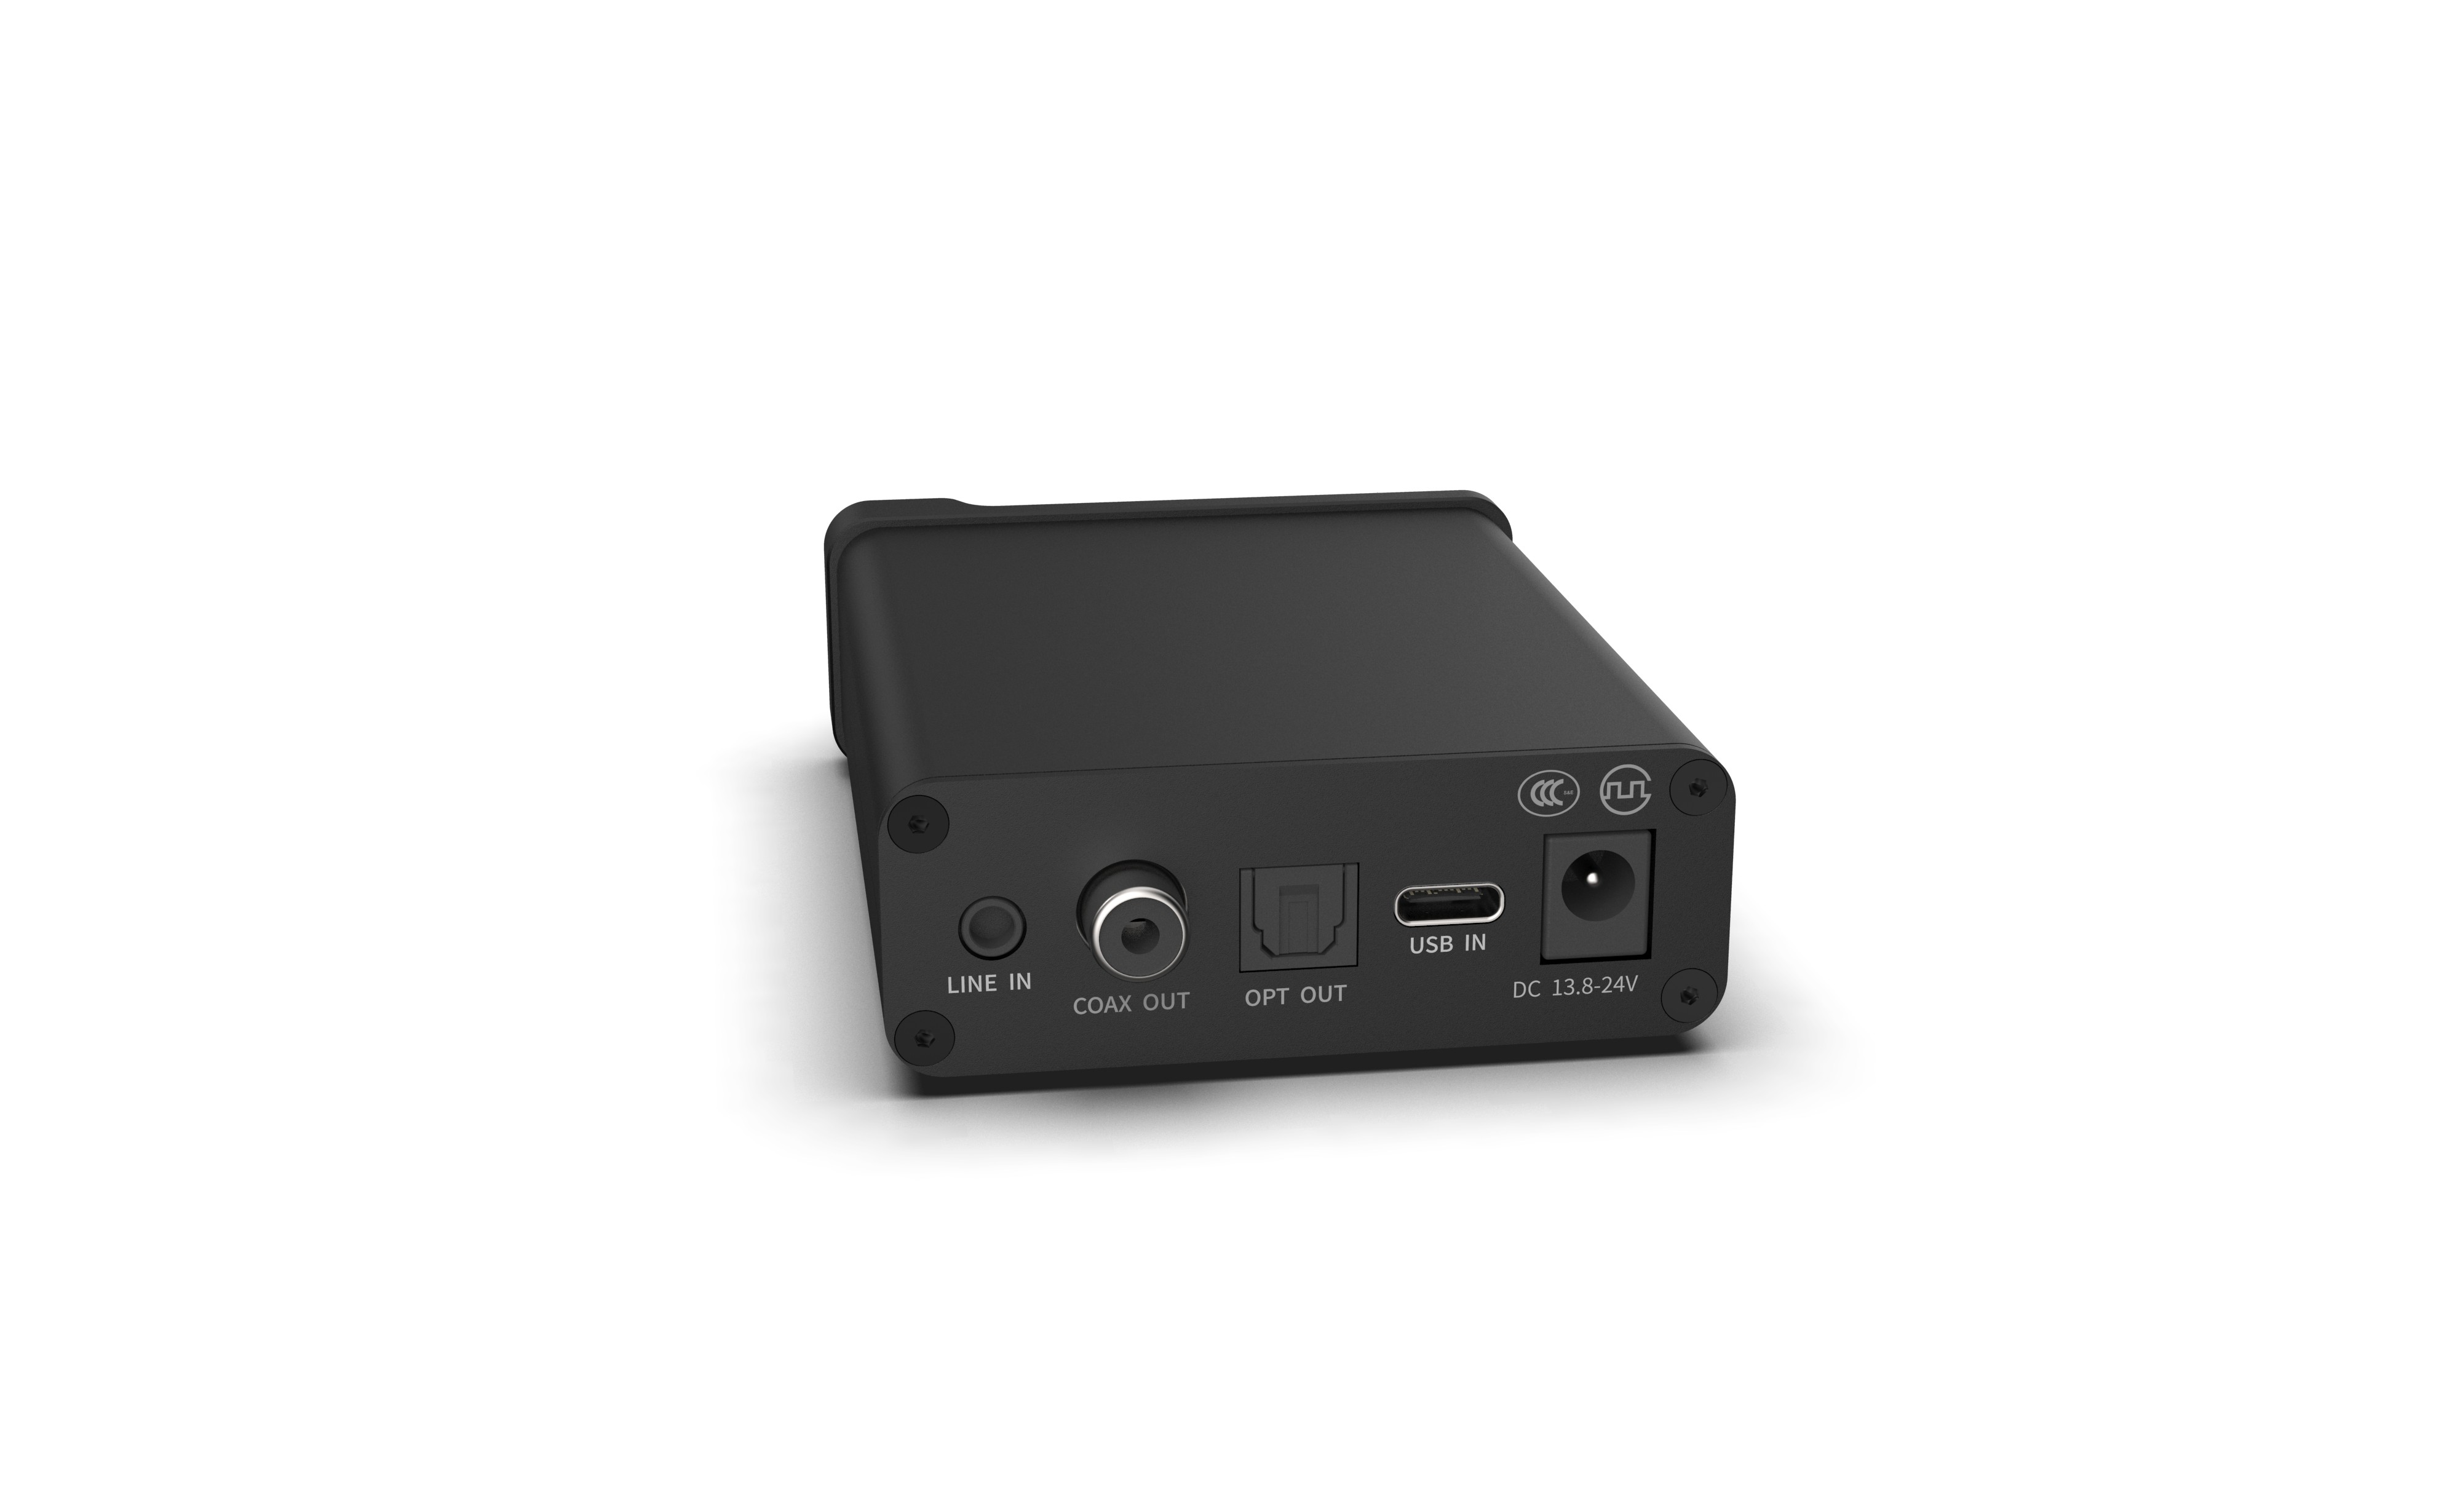
Flip the device to the back, where it fully tests structural engineers’ capability of sophisticated layout in limited space. On this compact rear panel, interfaces are densely arranged, including LINE IN (3.5mm), COAX OUT (Coaxial), OPT OUT (Optical), USB IN (Type-C) and DC 13.8-24V power input.
For audio decoders, background noise and high-frequency electromagnetic interference (EMI) are the biggest challenges. The adoption of full aluminum alloy housing essentially builds a perfect Faraday cage for shielding. Especially close to sensitive optical fiber and Type-C digital input ports, the aluminum rear panel plays a vital role in electromagnetic shielding.
From the perspective of CNC machining, the rear panel cutouts are highly challenging. For example, the irregular polygon hole with anti-reverse notch for OPT OUT port, and the closely arranged USB Type-C slot below. Substandard machining accuracy will cause difficult interface plugging & unplugging, cable scratching, or even deformation of the internal PCB. The rear panel of this prototype features perfectly clean cutout edges without any burrs. Meanwhile, the white background silk screen prints (including CCC certification marks) are precisely aligned with the center line of each port, reflecting high-standard machining and silk screen positioning capability.
Agile R&D: Underlying Structure and Selection Strategy for Cost Reduction and Efficiency Improvement
Many hardware project managers may think that such a perfectly fitted, high-texture enclosure requires huge upfront sunk cost for full CNC processing or mold opening, with an R&D cycle of at least one and a half months.
Here we reveal the core advantage enabling fast and cost-effective delivery of this prototype — its main frame is secondarily developed based on YONGGU H-series (Split Junction Anodization Box).

Take a close look at the middle section connecting the front and rear panels; it is an integrally formed aluminum extrusion profile. By adopting ready-made YONGGU H-series standard profiles, we completely skip the costly and time-consuming aluminum extrusion mold opening process. The profile itself comes with smooth rounded R-angle transitions and reserved internal sliding grooves, allowing the PCB mainboard to be directly inserted and fixed. It eliminates complicated internal support pillar design and greatly optimizes the internal heat conduction path for high-power heating components.
In this project, our customized workload is only concentrated on CNC drilling and chamfering of front and rear aluminum panels, as well as overall sandblasting, anodizing, laser engraving and silk screen printing. With the YONGGU Enclosure solution of "standard profile + in-depth customized modification", we obtained a prototype comparable to fully customized non-standard molded parts in just a few days. Meanwhile, the BOM cost of the enclosure is well locked for mass production. For hardware teams pursuing premium product appearance while controlling R&D cycle and budget, making good use of mature aluminum enclosure and chassis solutions is the key shortcut to stand out in the hardware market competition.


